Raspi Router
I have seen the Raspberry Pi used for a lot of things since its release in 2012, but when I wanted to run one as a router the information was pretty limited. Most people who posted about their pi routers were manually setting up packet forwarding, some went a step further and made things a little simpler by using Webmin. I was looking for something more streamlined and dedicated to my router cause.
After some research into the normal Linux router OSs I found that ipfire had an ARM image available. The ipfire wiki had a few warnings about version 2 of the pi but I didn’t experience any issues with the installation. After trying this OS out, it worked better than expected.
Once you are finished you have a complete advanced router with a nice web interface, and a plugin system.
Here are the things you will need.
- Raspberry Pi Bundle (Cheaper to buy it all separate, but two day shipping with Prime)
- 4GB SD Card (a 1GB is fine, but cards are so cheap I never go below a 4GB.)
- USB Network Adapter (I used this list to find this adapter)
- latest ipfire ARM image without serial
I did the image install using OSX with dd. Replace N with the disk number that represents your SD Card.
dd if=/path/to/image.img of=/dev/diskN
For Windows you could use Win32 Disk Imager to load the ipfire image onto the SD Card.
Once the ipfire is loaded on the card you will need to insert it into the Raspberry pi. At this point you will also need a keyboard and monitor. Once ipfire is configured you can remove the monitor and keyboard.
The ipfire wiki has a nice set of screenshots of each step with some explanation.
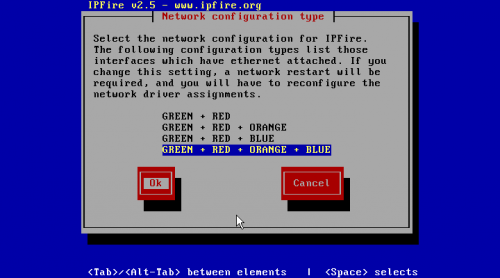
The most difficult part will be setting up the network. It is really the way they present it that makes it seem difficult, but it is actually pretty straight forward. Most configurations will be a Green + Red setup. This is a typical WAN/LAN setup. One NIC for the internet side and one NIC for the LAN side. Ipfire also allows for a DMZ and WLAN to be assigned but in this case I am only doing Green + Red. For more information on the differnces between the Red, Green, Orange and Blue networks see the ipfire wiki.
Once you set the type of network you plan to use, you now have to tell ipfire which interface to use as the Red interface and which to use as the green interface. I used the onboard NIC for Red and the usb adapter for Green. That was just my preference.
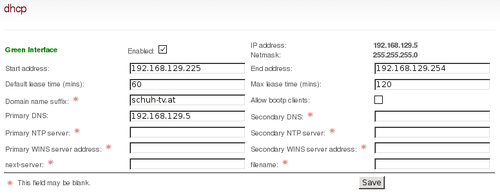
In most cases the Red interface will be set to DHCP, this ip should be assigned by your ISP. The Green interface should be something like 192.168.1.1.
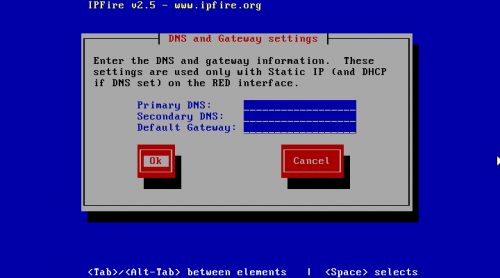
Under DNS and Gateway Settings I entered the Google public DNS (8.8.8.8 and 8.8.4.4) as the Primary and Secondary addresses.
Once that is complete everything else can be done from ipfire web interface. Unhook your monitor and keyboard and open a browser on a remote workstation. Point your browser of choice to the Green interface ip, in this article i noted 192.168.1.1, and use port ** 444. This will also be https (ex. **https://192.168.1.1:444).
From here you can configure your pi router as you would any other router, with a few extra options.
One downside to the setup i describe above is the lack of wireless. Since most SOHO routers come with wireless these days this setup may not be best for you. In my case I had a Meraki access point laying around so I had the luxury of using that. That is just something to think of when deciding to switch to this setup.
If anyone knows how to use the raspi as an access point, that would be something nice to add to this.